
Where to Find It
Advanced features are spread across the timeline controls, clip settings, and project settings panels. This article brings them all together.
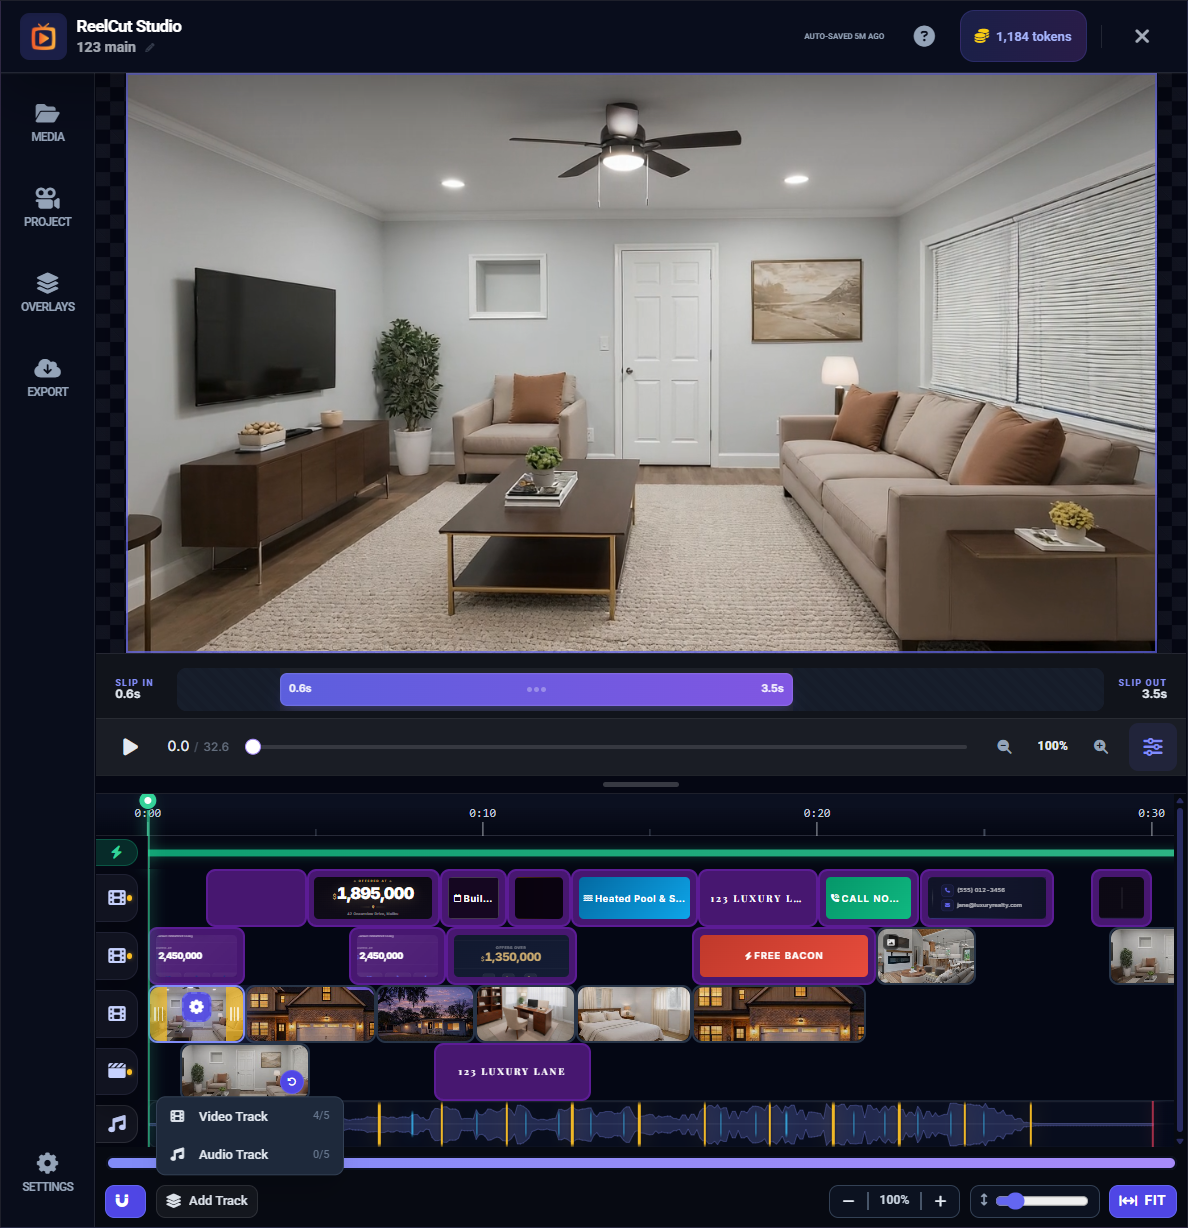
Multi-Track Editing
ReelCut Studio supports multiple tracks for layering content:
- Up to 5 video tracks (V1–V5) — Layer video clips on top of each other
- Up to 5 audio tracks (A1–A5) — Add multiple music or sound effect layers
- Up to 3 overlay tracks (OV1–OV3) — Stack text, images, and title cards
Use the Add Track button in the timeline controls to create additional tracks as needed.
Track Layout Modes
Each video track can operate independently in either layout mode:
- Sequential (Ripple) — Clips sit back-to-back. Moving one shifts the rest. Best for quick montages.
- Free (Absolute) — Clips have fixed positions with gaps allowed. Best for precise timing control.
Switch modes from the track options. Switching from Free to Sequential shows a confirmation because it removes all gaps.
Tempo Sync Variants
When using Tempo Sync, you can cycle through three different strategies:
- v1 — Standard beat matching. Clips align to primary beats.
- v2 — Alternative rhythm pattern. May distribute clips differently across beats.
- v3 — Third variation. Experiment to find which creates the most pleasing rhythm.
Click the variant button repeatedly to cycle through v1, v2, and v3. Each applies a different approach to matching your clips to the music's tempo.
Image-to-Video AI Conversion
Transform still photos into cinematic video clips with AI-generated camera movement:
- Select a photo clip on the timeline
- Click Convert to Video in the clip settings
- Choose your crop area and camera movement type
- Select duration — 5 seconds or 9 seconds
- Review the token cost and click Start Rendering
- The AI generates a smooth pan, zoom, or orbit movement
This is perfect for turning property photos into dynamic video content without any actual video footage.
Cross-Track Drag and Drop
Move clips between different video tracks by dragging them up or down. This lets you rearrange your content across layers for more complex compositions.
Pending Move Dialog
When you move a clip while Tempo Sync is active, a dialog appears with three options:
- Adopt Tempo Timing (recommended) — The moved clip adjusts to match the destination slot's beat timing
- Keep Original Timing — The clip preserves its current trim length
- Cancel Move — Undo the reorder
Rolling Preview
The editor continuously renders a preview of your final video in the background. The render bar above the timeline shows progress. This means you can watch a near-final version of your montage as you edit, without waiting for a separate render step.
Boundary Trimming with Snap

When you drag the edge of a clip to trim it, the edge automatically snaps to:
- Beat markers from your background music
- The edges of adjacent clips
- The playhead position
This makes it easy to create precise, beat-synced cuts.
Slip Editing
Slip editing lets you shift which portion of a longer video is visible within a clip:
- The clip's position and duration on the timeline stay the same
- But the visible content shifts — like sliding a window along a filmstrip
- Use the slip bar to control which section of the original video is shown
Tutorial System
ReelCut Studio includes a built-in tutorial with guided coach marks. When activated, it highlights specific areas of the editor one at a time and explains what each tool does. You can access it from the Help panel.